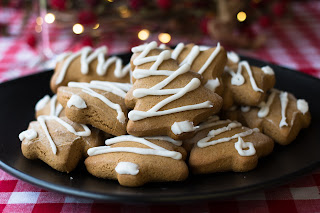
Episode 4.10 Gluten free Gingerbread
It's beginning to look alot like Christmas!
 There is something about the aroma of cinnamon, cloves, nutmeg - they all say "It's Christmas" and there is nothing better than having the whole house infiltrated with wafts of Christmas baking. Of course, here in Australia, it's mid summer at Christmas, and so most of my Christmas baking is done in the late afternoon/evening (I'm not an early riser!). It is important with gingerbread, as well as shortbread, that the kitchen is cool, and so are your hands, otherwise you wont get the best results. Once the dough is made, you can always pop it into the fridge for 30 minutes to rest and chill.
Recipe
Makes 20 biscuits
Royal icing for decorating (optional)
Preheat oven to 160°C fan/180°C.
Cream butter and sugar until light and fluffy. Add the egg and beat until well combined.
In a separate bowl, whisk together all the dry ingredients. Add these to the butter mixture and mix until well combined. Add the treacle and vanilla and mix well. Turn the mixture onto a floured board and knead lightly until smooth. Place the mixture onto cling wrap, and refrigerate for 30 minutes.
Meanwhile, line 2 baking trays with baking paper.
Remove dough from the fridge, and sandwiched between two sheets of baking paper, roll out to a thickness of 5 mm. Using a cutter dipped in flour, cut out desired shapes and gently place onto the prepared baking trays, leaving about 2-3 cm between each biscuit. Continue until all the dough is used. Place the baking trays in the middle of the oven and bake for 12-15 minutes.
Allow to cool on the baking trays, until placing on a wire rack. Decorate with royal icing.
 There is something about the aroma of cinnamon, cloves, nutmeg - they all say "It's Christmas" and there is nothing better than having the whole house infiltrated with wafts of Christmas baking. Of course, here in Australia, it's mid summer at Christmas, and so most of my Christmas baking is done in the late afternoon/evening (I'm not an early riser!). It is important with gingerbread, as well as shortbread, that the kitchen is cool, and so are your hands, otherwise you wont get the best results. Once the dough is made, you can always pop it into the fridge for 30 minutes to rest and chill.
This recipe has taken quite a bit of research to get "just right". I wanted a gluten free gingerbread that held its shape, didn't get the "barking" on the top and had the texture of one with wheat. It took a lot of trial and error, but I guarantee that no-one will realise you have made gluten free with this one.
For the best results, I recommend using the individual flours listed below, but of course you could use a commercially obtained plain flour blend (all purpose flour)(1 1/2 cups). As these blends all differ widely, I cannot guarantee the results.
Here are a few tips I discovered during my research:
To see how to make this recipe, check out my YouTube video below.
For the best results, I recommend using the individual flours listed below, but of course you could use a commercially obtained plain flour blend (all purpose flour)(1 1/2 cups). As these blends all differ widely, I cannot guarantee the results.
Here are a few tips I discovered during my research:
- Roll the dough to about 5 mm. It will still rise to a nice thickness, but will all cook through and not leave you with a "bendy" biscuit.
- You can keep rolling out the dough to use all the scraps, but you may need to chill the dough as working it too much can make it sticky and hard to work with.
- Get good quality cutters. A crisp shape will give you the best results.
- Once the biscuits are cooled, use a pastry brush to brush away any excess flour left by the cutters
- Make sure to cut the baking paper (parchment) to fit the tray, as the biscuit can become misshapen if the paper is pressing on it
- Warm icing mix before application, it's a lot easier :)
To see how to make this recipe, check out my YouTube video below.
Recipe
Makes 20 biscuits
• 75 g brown sugar
• 70 g unsalted butter, at room temperature
• 1 egg
• 65 g white rice flour
• 65 g brown rice flour
• 32 g tapioca flour
• 40 g potato flour
• 35 g cornflour
• 7 g xanthan gum
• ¾ tsp baking soda
• 1¼ tsp ground cinnamon
• 1 tsp ground ginger
• ¼ tsp ground cloves
• ¼ tsp salt
• 3 tbl treacle
• ½ tsp vanilla extract
Royal icing for decorating (optional)
Preheat oven to 160°C fan/180°C.
Cream butter and sugar until light and fluffy. Add the egg and beat until well combined.
In a separate bowl, whisk together all the dry ingredients. Add these to the butter mixture and mix until well combined. Add the treacle and vanilla and mix well. Turn the mixture onto a floured board and knead lightly until smooth. Place the mixture onto cling wrap, and refrigerate for 30 minutes.
Meanwhile, line 2 baking trays with baking paper.
Remove dough from the fridge, and sandwiched between two sheets of baking paper, roll out to a thickness of 5 mm. Using a cutter dipped in flour, cut out desired shapes and gently place onto the prepared baking trays, leaving about 2-3 cm between each biscuit. Continue until all the dough is used. Place the baking trays in the middle of the oven and bake for 12-15 minutes.
Allow to cool on the baking trays, until placing on a wire rack. Decorate with royal icing.


Comments